Tokyo Westerns CTF 2016 - Recovery 1: deadnas
Wed, Sep 7, 2016
Writeups #ctf #tokyowesterns #2016 #forensics
The situation was given as such:
Today, our 3-disk NAS has failed. Please recover flag.
Upon extraction, the file list was as such
root@kali:~# 7z x deadnas.7z

7-Zip [64] 9.20  Copyright (c) 1999-2010 Igor Pavlov  2010-11-18
p7zip Version 9.20 (locale=en_US.UTF-8,Utf16=on,HugeFiles=on,2 CPUs)

Processing archive: deadnas.7z

Extracting  deadnas/disk0
Extracting  deadnas/disk1
Extracting  deadnas/disk2
Extracting  deadnas

Everything is Ok

Folders: 1
Files: 3
Size:       1048588
Compressed: 499418
root@kali:~# ls -la deadnas
total 1036
drwxr-xr-x  2 root root   4096 Sep  2 19:24 .
drwxr-xr-x 17 root root   4096 Sep  7 16:50 ..
-rw-r--r--  1 root root 524288 Jun 16 13:56 disk0
-rw-r--r--  1 root root     12 Jun 16 14:01 disk1
-rw-r--r--  1 root root 524288 Jun 16 13:56 disk2
and running file on all the files showed a FAT32 file, a text file, and a data file
root@kali:~# cd deadnas/
root@kali:~/deadnas# file *
disk0: DOS/MBR boot sector, code offset 0x3c+2, OEM-ID "mkfs.fat", sectors/cluster 4, root entries 512, sectors 2048 (volumes <=32 MB) , Media descriptor 0xf8, sectors/FAT 2, sectors/track 32, heads 64, serial number 0x867314a9, unlabeled, FAT (12 bit)
disk1: ASCII text
disk2: data
Now, we know that this is a NAS device and that there are 3 drives. The first thing I thought to do was open the first disk (disk0) in dff GUI and see what it shows.
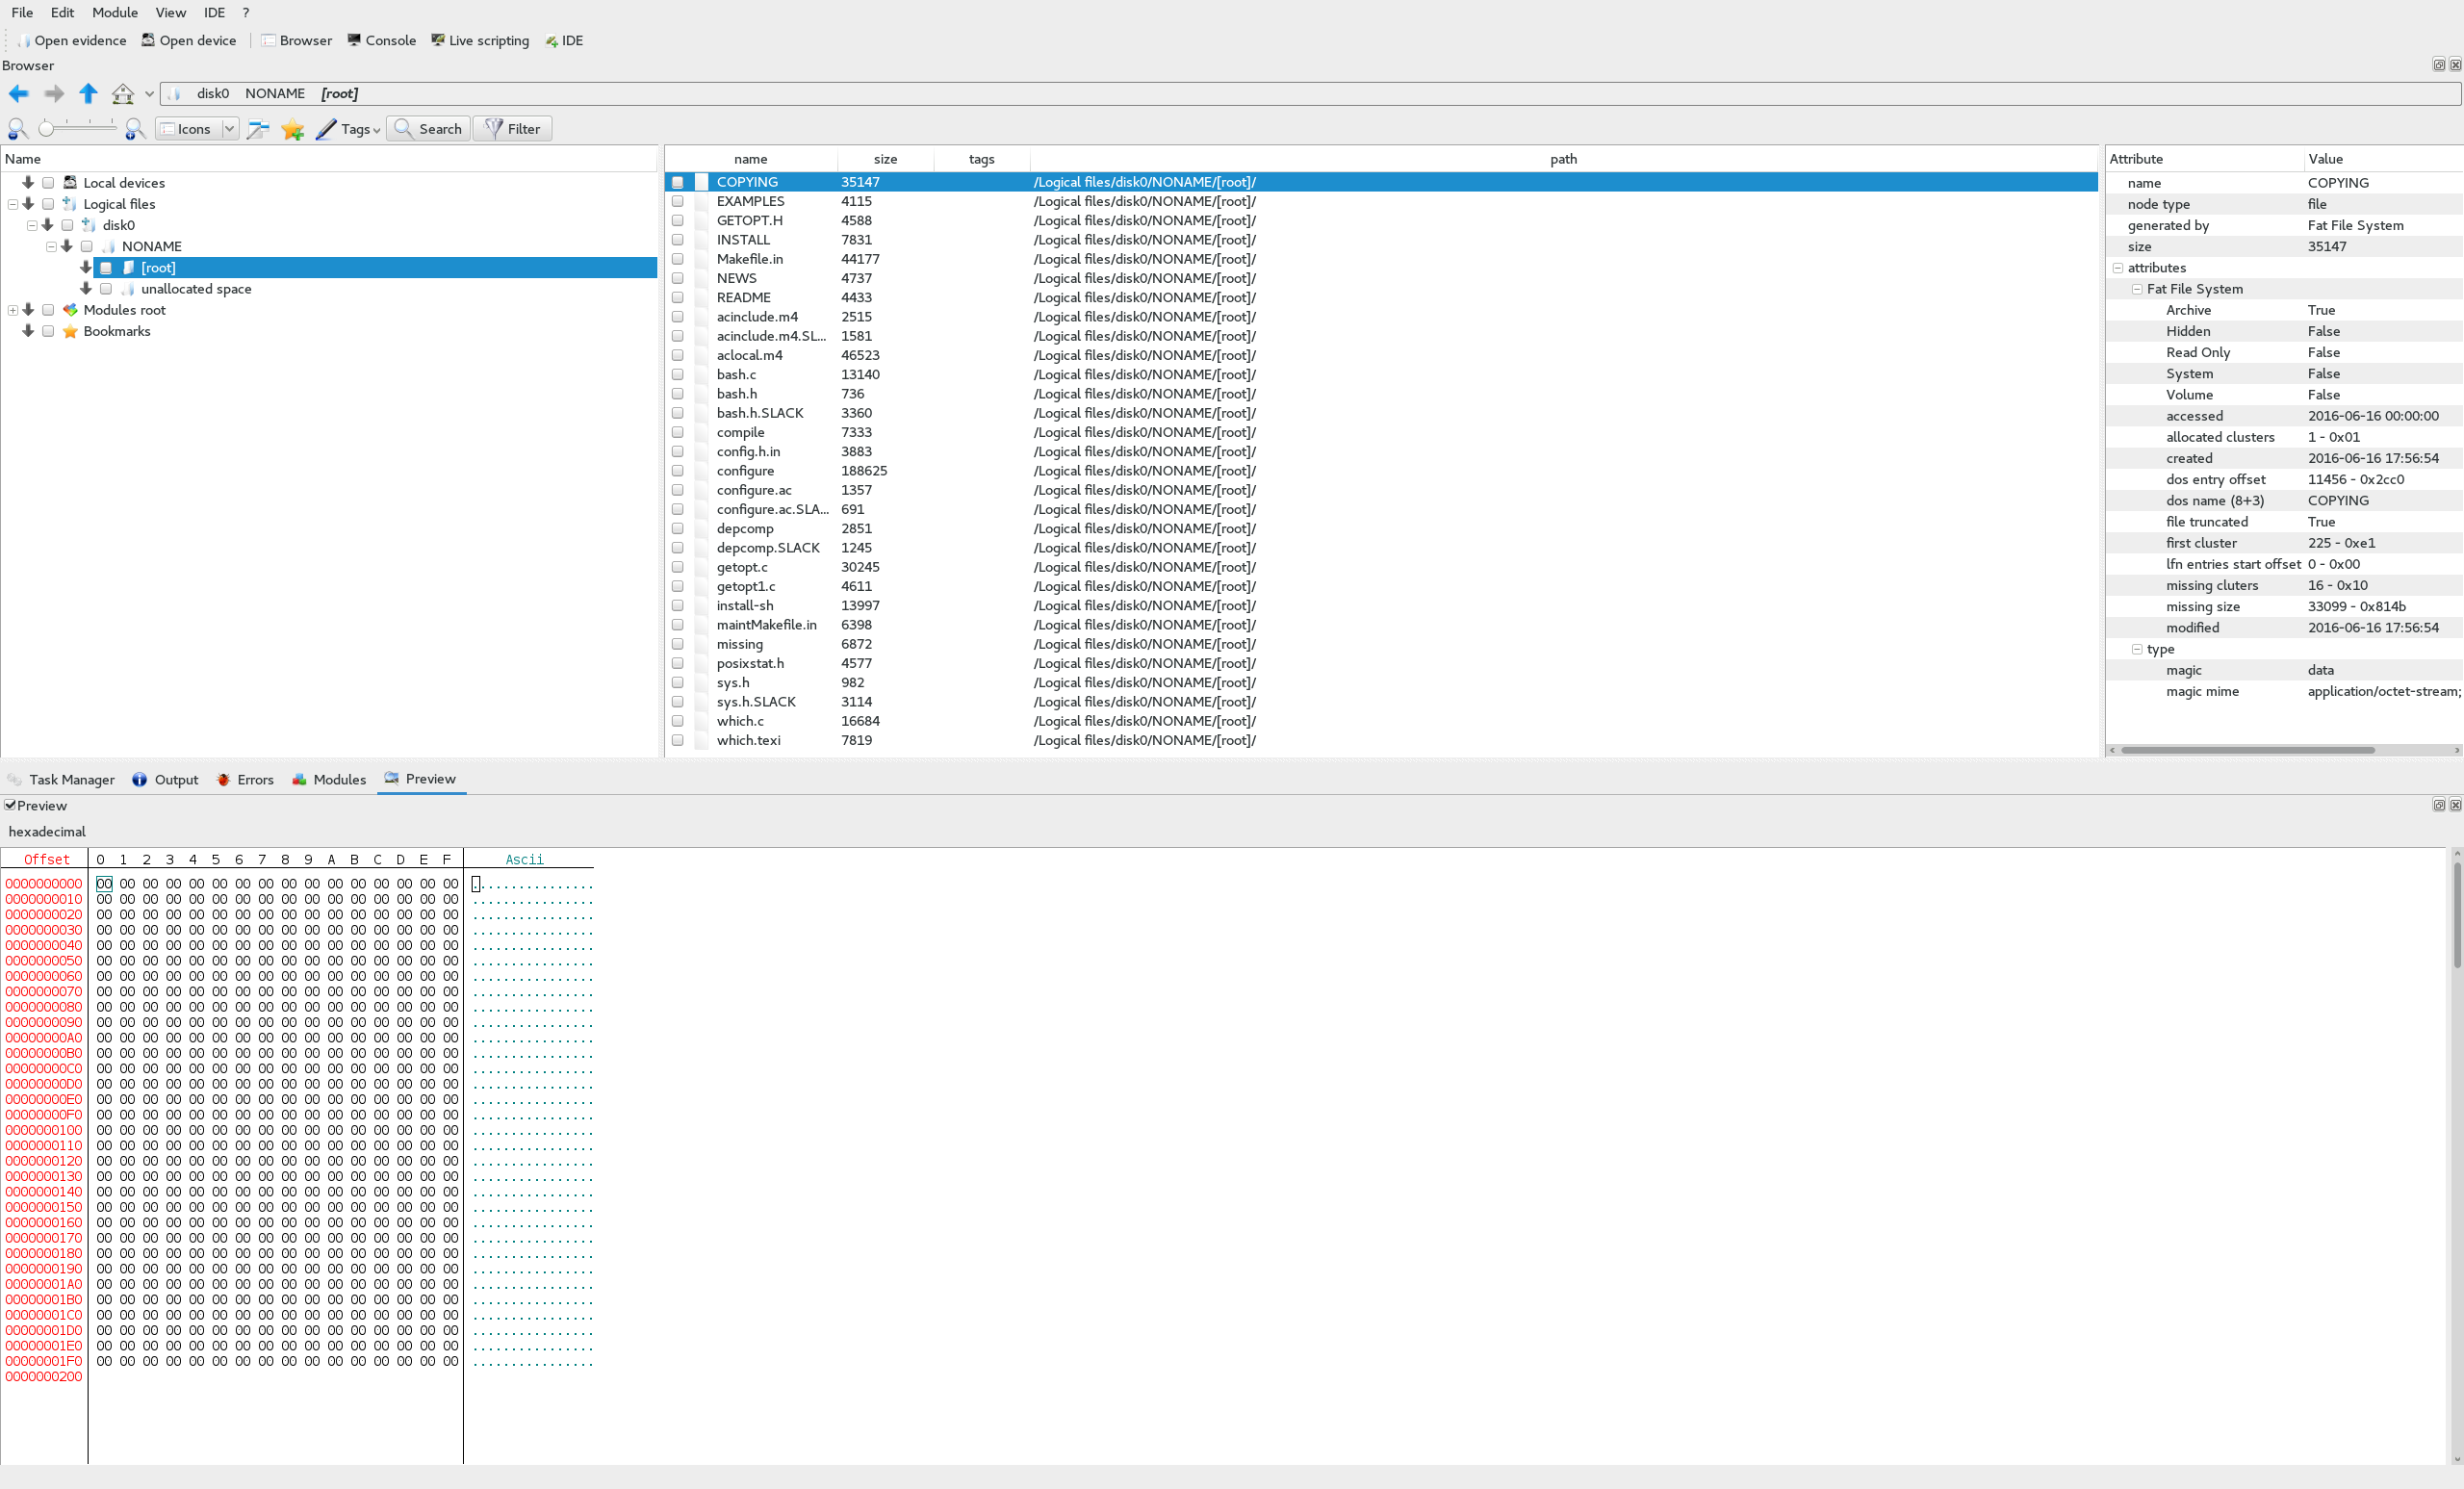
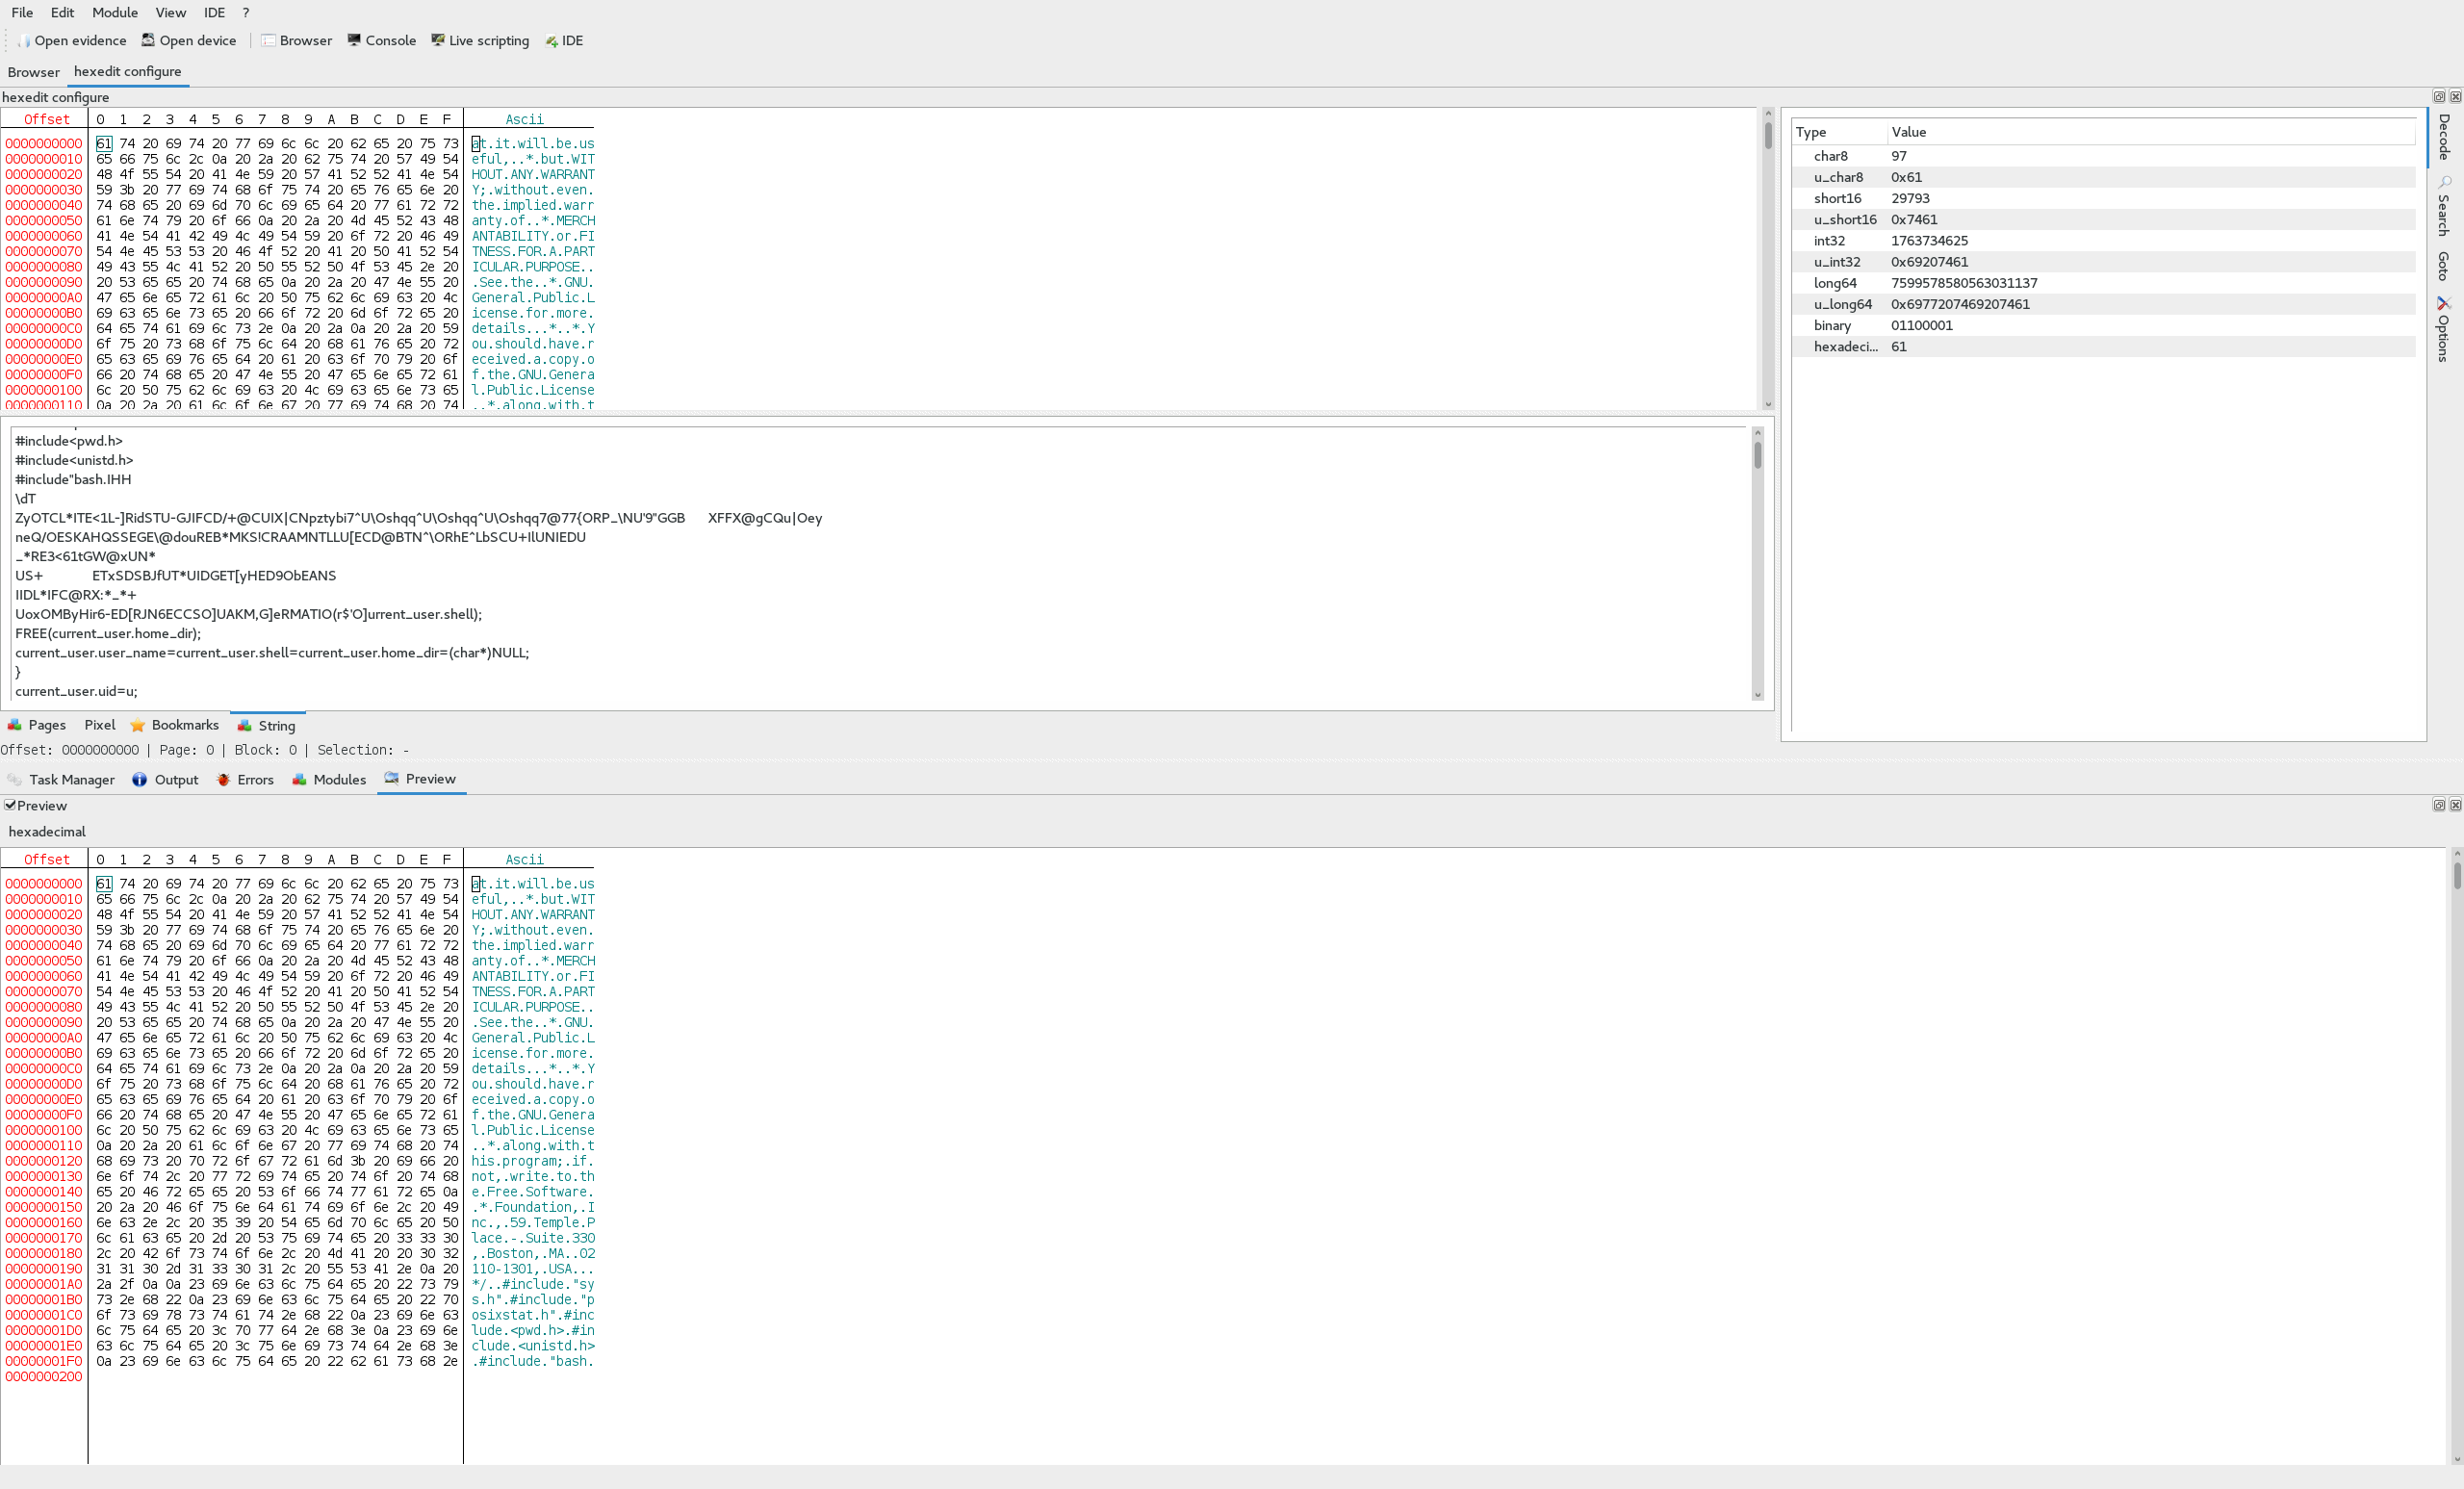
Of cource, it couldn’t be that simple. We can see here that there are a bunch of C files for some kind of source code, but nothing that looks like a flag. In addition to that, if we look at the contents of some of these files, such as configure, we can see that they appear to be broken in some parts, plaintext in others, and it only goes up to 0x200, or 512.
Now, if you know much about NAS’s, more often than not you put your drives into a RAID configuration. The most common RAID types that are used are 0, 1, 5, 6, and 10 and each has it’s own advantages and disadvantages. Due to how we can see the data is not sequantial and consistent, it is safe to assume that these drives are likely in RAID and it is most likely not RAID 0, 1, and 10, especially with only 3 drives in the array.
That leaves RAID 5 and 6. Now, to understand how these are especially good choices based on that this is a challenge and we are assuming it can be solved, we must first understand how RAID 5 and 6 behave. Since RAID 6 is based on RAID 5, I will briefly cover how RAID 5 works in a simplified form.
In RAID 5, you must have at least 3 drives in your array. When data is written to the drives, it is striped into sections based on your configuration. Every drive gets part of the data every stripe, sequentially, and one of the drives is used for parity. When data is written to the drives, it is XOR’d and that result is written to the block on the parity drive (in addition, the drive used for parity rotates forwards or backwards each block). The unique nature of the XOR bitwise function is that it is totally reversible, as long as you have the other factors in the equation.

For example,
A XOR B = C
C XOR B = A
C XOR A = B
As you can see, this is very advantagous because it allows us to recover data across stripes, not just for a single drive. RAID 6 is very similar to RAID 5 in that it does the same thing, however it adds another parity block for additonal redundancy and the computation of the second parity block is more complicated than a simple XOR operation.
I took the liberty to assume that it was likely RAID 5 (which was later confirmed with hints provided to the challenge) and wrote out a simple script in python that would be able to rebuild our missing drive and combine the 3 drives into a single disk image.
with open('disk0', 'rb') as f:
    disk0 = f.read()

with open('disk2', 'rb') as f:
    disk2 = f.read()

#XOR data in disk0 and disk2 to rebuild disk1
disk1 = ''.join([chr(ord(d0) ^ ord(d2)) for d0, d2 in zip(disk0, disk2)])

#create a RAID 5 "array"
raidArray = [disk0, disk1, disk2]

#our block size is 512 (remember from earlier how it cut off at 0x200?)
BS = 512

#open our output disk file
with open('disk', 'wb') as f:
    #iterate over the blocks (disk length / 512 bytes per block)
    for blockIndex in xrange(len(disk0) / BS):
        #calculate our parity drive index rotating backwards, starting with the last drive
        parityIndex = (2 - blockIndex) % 3

        #iterate over the 3 drives in the array
        for driveIndex in xrange(3):
            #make sure not to pull data from the parity drive, we only want actual data
            if driveIndex != parityIndex:
                #calculate our starting byte position
                blockStart = blockIndex * BS

                #write the data from the starting byte to 512 bytes after it from the target drive
                f.write(raidArray[driveIndex][blockStart:blockStart + BS])
After execution, we are left with a file, disk, with a filesize of 1024kb and it’s file output is
root@kali:~/deadnas# file disk
disk: DOS/MBR boot sector, code offset 0x3c+2, OEM-ID "mkfs.fat", sectors/cluster 4, root entries 512, sectors 2048 (volumes <=32 MB) , Media descriptor 0xf8, sectors/FAT 2, sectors/track 32, heads 64, serial number 0x867314a9, unlabeled, FAT (12 bit)
Looks promising, let’s see if it’s valid…
We mount the image using losetup
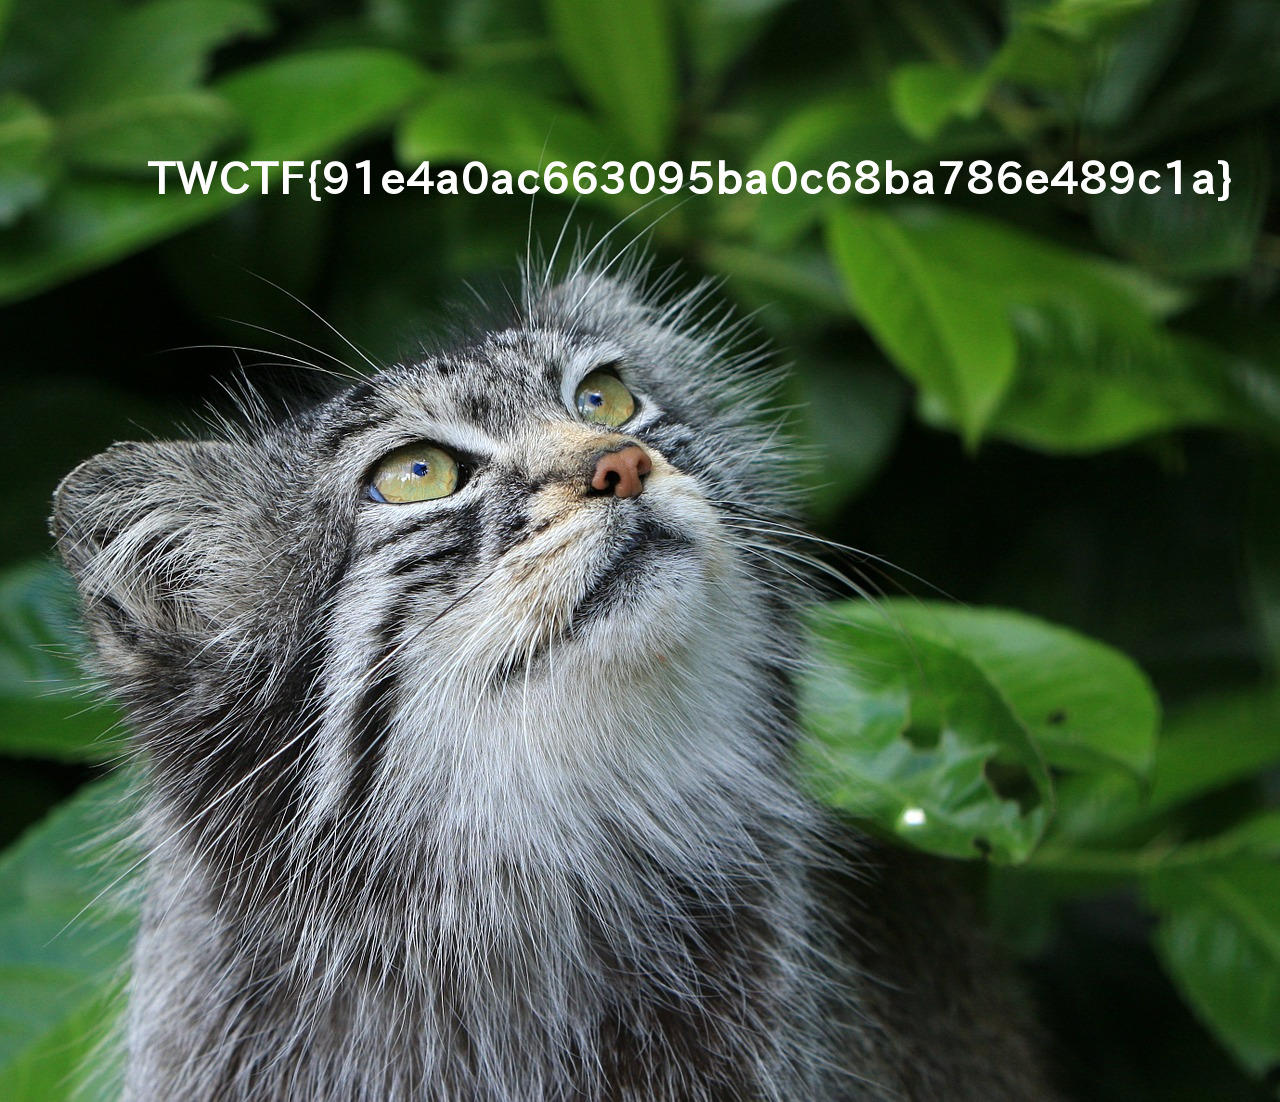
root@kali:~/deadnas# losetup /dev/loop0 diskAnd we are left with a file, flag.jpg, in our mounted disk!
P.S. Remember those C files we saw in dff? That was the source code to which-2.21, just to throw us off…
~Joel